...
Creating a custom image such as this can be done with programs like Adobe Photoshop among others. If you have an artist on staff, you can be as creative as you want. Common image types like .jpg or .png files are supported to allow images with (.png) and without (.jpg) transparency. Images with transparency will allow for more creative shapes for infopopups such as the leaf example above. Once you have an image ready to go, it will need to be hosted online someplace. Simply then Once hosted, simply add that custom html address to the configure window and set the height and width dimensions to match your picture's. This can easily be discovered by right clicking on the image in a web browser and selecting "Image Properties" or "Inspect Element" if you don't know what it is.
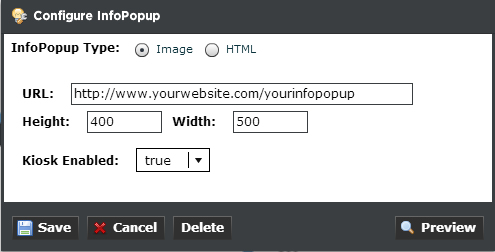
The configuration menus for HTML or image InfoPopups are slightly different, but contain similar options. The user should determine a pop-up size in pixels, a display time should be established, and either HTML body text or a URL should be entered. The user should save any changes made, and the can preview the pop-up by selecting the “preview” button to the right. The user can choose to enable or disable the pop-up at any time by choosing ‘true’ or ‘false’ from the kiosk enabled menu.


Standard HTML based configuration and Infopopup.
| Info |
|---|
Note: info popup kiosk time has since been moved to the Kiosk Timing Manager and is not available unless the info popup already exists |